2019 marks the second year in a row, iDESMO has made CSS at VIR, and it will not be the last. As President of iDESMO, I must always remind myself of our club’s shared vision, “iDESMO is the Indianapolis-based Desmo Owners Club. We are continuously on the path to ridecraft mastery, together with like minded Ducatisti. We pursue skill, safety, and camaraderie, and passionately lead this pursuit by example.” And putting us on a trajectory with trips to one of the countries crown racetrack facilities to learn from some of the best in the business of motorcycle mastery is a pursuit that we should and will continue to promote. For the 2019 article about the experience, I asked each participant to take a look at the topics they studied over the 2 day course and pick one that made a difference in their riding. This article is to provide a taste of what is done at the school, however, what makes this school so special is the attention to the professionalism of the instructors, coaches and the content that can only be experienced by attending. Please, read the takeaways, but more importantly, join us next spring for the trip to VIR!! Below are those takeaways.
Geoff Gruber
I chose to discuss “wide-view transitions”. This topic really opened my eyes (pun intended) to a part of my riding that I didn’t even realize I was doing. While entering a corner, I found myself fixating on a specific point, or where I wanted the bike to go. Once I got close to that point, I would quickly look for the next point on the track where I wanted to be, and often found my eyes bouncing back and forth. The the idea of smoothly transitioning from one reference point to the next, has given me more confidence during corner entry.
By smoothly transitioning your focal point from one reference point on the track to the next, your eyes communicate more information to your brain without gaps/blank spots in it. We did an exercise in the classroom to prove this theory, and it truly was a “ah-ha” moment for me. I feel this was a huge addition to my riding, because our vision, and how we perceive what is in front of us at speed is critical to navigate corners quickly and safely.
The week after our school, we had a WERA race weekend at Nelson Ledges near Cleveland, OH. This was a new track for me, so my lines were ugly at first, but I applied the wide view transitions principle and it really helped to slow down my eyes. It’s tough to quit cold turkey, and I still felt my eyes moving back and forth slightly throughout the weekend, but not nearly as bad as what it used to be.
So much was learned during our two-day School at VIR. Now it’s time to apply it. In two weeks, we will be racing at Grattan Raceway in Grand Rapids, MI…a track I have been to multiple times, and enjoy riding.
Vincent Cascella
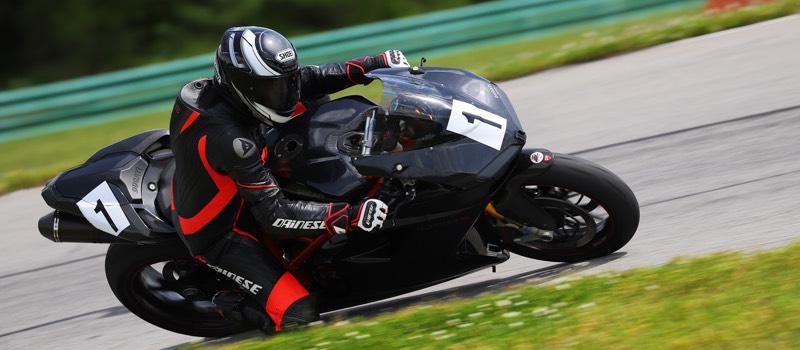
When it comes to body position, which is the primary lesson throughout 5 on-track sessions along with 5 classroom sessions during level 3 of the California Superbike School, the Knee 2 Knee drill is a brilliantly simple concept that has made a big difference in my riding.
Simply stated, the Knee to Knee cues the rider to maintain constant contact with at least one knee connected to the tank at all times. This is especially relevant during transitioning from side to side – like a chicane where quick transitions are necessary and bike stability is required. To visualize this drill, picture yourself sitting on your bike with one knee out as if you’re leaning into a turn. The other knee (or inner thigh) is connected to the tank. With a turn coming up to the opposite side, you simply re-connect your out Knee to the tank BEFORE throwing out your opposite knee to enter the next turn, thus maintaining constant connection to the bike.
Bike stability is always the ideal condition and it demands a focused connection to the bike using the right body part matched to the right bike part. When steering, excessive input placed on the bars (the wrong body part paired with the wrong bike part) will cause instability and fatigue – two things you do not want. This excessive input is the byproduct of a loose connection to the bike at the tank with the knees (right body part with right bike part) while steering. Of course, the knees are closely positioned to the core and hips, otherwise known as the posterior chain – the strongest part of your body. Distributing most of your work load to that area of your body is much more efficient, and it’s much closer to the bike’s center of mass.
I’ve always been guilty of this and I know my riding performance has suffered because of it. But after applying this lesson over the course of the day, I noticed a more confident feeling of connection to the bike, and way less fatigue by the end of the day.
David Jenkins
Level III – Hook Turn technique
Suppose you are riding wide in a turn. Your lean angle and front tire’s traction are maxed out. Applying the front brake in this situation could result in a “low-side” crash. To get your bike back on a good line, the Hook Turn technique offers a way to shift weight toward the front tire to give it more contact patch (traction). Rather than simply leaning off to the side of the bike, lean forward while stretching your neck as far as it will go. Also, when performing a Hook Turn, it is important not to add any additional pressure to the handlebars.
The name “hook turn” was referred to at CSS as the hook shape of (1) the resulting tightening line, and (2) the less-than-90 degree angle your inside elbow makes when executing a Hook Turn.
While I need a lot more practice, I immediately noticed that the Hook Turn body position gave me more confidence and speed in certain turns, in part because the head-forward head position also improved my field of vision in turns.
John Lang
Level 1 – Session 4 “Relax”
After lessons on “Throttle Control”, “Turn Points” and “Quick Turn”, the attention is turned to “Rider Input”, and specifically, the need to “Relax” the grip on the bars so as to not disrupt the bike through the turns. Once turn in is initiated via counter steering (pushing on the right grip to turn right or the left grip to turn left), the objective is to refrain from any additional inputs to the bars. In order to maintain the best line through the turn, it is important to only steer once. Excessive grip on the bars or use of the bars to support the rider or affect body position on the bike can be counterproductive, resulting in additional bar inputs that upset the bike and disrupt the line. Hence, the “Relax Drill” emphasizes a loose grip on the bars that allows the rider to avoid subsequent bar input after turn in is initiated. Emphasis is placed on the use of the knees on the tank grips as well as the core muscles to affect appropriate changes in body position – not pressure on the bars! To illustrate the point, the coaches would often flap their elbows like chicken wings to emphasize the lack of tension (and input) being transmitted to the bars through the arms.
The following video illustrates the emphasis on bike stability that is included in Level 1 of the California Superbike School curriculum, including the “Relax Drill”.
California Superbike School Level 1 – “Relax Drill” comments begin at 6:07
The video below, while less instructive, does illustrate a session focused on the “Relax Drill” from August of 2017 at VIR.
Keith Code’s California Superbike School w/ Nate from Frontline Level 1: Relax Session
I found the “Relax Drill” to be very beneficial. It is something that I was reminded of by the coaches throughout my time at California Superbike School. It can be natural to want to grip the bars tightly, especially when taking greater levels of speed into a turn. In reality, taking the pressure off of the bars through a more relaxed grip will allow riders to avoid unnecessary bar inputs, resulting in greater bike stability and smoother lines through the turns. This requires transferring the tension away from the arms to the legs and core muscles so that the bike can “do its job” through the turn without disruption by the rider. As I continue to concentrate on the principles from this drill, I expect that it will have a positive impact on my lines.
Chris Gibson
The drills from levels 1 and 2 were all good learning experiences for me. The two that stand out most are Turn Points and Reference Points. “You use reference points to find out where you are on the track. This point is a spot or object of which you already know the location. It is something which clearly marks a place.” Reference points allow us to know where we are on a track and knowing your location on a track at high speeds allows time to slow down and sound decisions to be made about what actions are to take place when. Reference points should be in your line of vision and they are meant to communicate important messages to you. Apply brakes, turn in, hit the gas, the apex of the turn, your line, etc.
Hazar Dib
Body Position, you probably heard from some riders on track days telling you to hang off the seat, they probably talked about the triangle of light, to weight in on the pegs, to get your head down, all the above or a combination of them, etc..
To me body positioning the way I learned from the California Superbike School (CSS) is about having the right connection with the bike, being locked in such that you do not move in the seat under hard braking or at least minimal movement on the bike, and most importantly without adding input to the handlebar.
These principals are so simple yet easier said than done. Body positioning is broken down into steps all rooted in what you are trying to do on the bike, it starts with your position in the seat, the way you connect to the handlebar, the way it allows you to open your body towards the turn, and finally in this write up the location of the head. For the rest, I recommend attending level 3 with CSS and level 4 to discover what works for you.
Seat position as it relates to body position: first question people ask is how far you should be in the seat? Many will have theories and recommendations for you on specifics. I recommend you start first by considering what is it exactly you are trying to accomplish. To me, it is about making sure I can do what I want to do on the bike without my body getting in the way, and without affecting the geometry of the bike and center of gravity. Stable bike is a stable line, making sure one is locked in on the motorcycle.
Body positioning and where one sits on the bike will vary from one person to another based on the dimensioning of their body, legs, arms, etc.. Key to successful body position is to have strong core and leg muscles. On this subject, I recommend for a start the following link from CSS another showing how CSS will work with you on your body positioning
Body position and the way you connect to the handlebar: Make sure your wrists are in alignment and have good control and a good feel while remaining comfortable. The “holding a screwdriver” position is a good analogy if you ever held a screwdriver. On this subject, I recommend the following video from CSS
Allowing your body to turn and head location: I think you would agree that the position of the head would affect what you can or can not see and therefore your line, and overall your riding. First, make sure that your helmet fits you well and is not obstructing your line of sight, you do not want to strain your neck muscles trying to see through the corner. As far as allowing your body to turn, you want to be sitting instead further back in the seat then against the tank; this will enable you to point your body towards the turn without affecting your lock into the bike. On these topics, I recommend from CSS the following videos.
Greg McDaniel
3 Step
So the idea of the 3 step is smooth transitions of the eyes allowing you to focus on where you want the bike to go, once you are certain you will hit that mark, you move the eyes to the exit, than to the next apex and so on and so forth. This is a level 2 skill but we came back to it in level 4 for me, as my coach was helping me with my missing a few apexes. This skill came back full circle at Putnam this past week, when because of the repaving, all my markers were gone. 3 step helped me settle my eyes, hit my marks and make for a relearning of this track. Last session I was back down to my personal best times and was very happy about the progress throughout the day. I followed up CSS with my first ever race, and the skills I learned at this school specifically prepared me for a successful weekend in a very new environment. (new track, new experience) 3 step and the calming effect on my eyes helped me make my way through the field in the race.
Closing
CSS is a great way for us to start the riding season. It helps put our minds in the right place and now that we are doing level 4, the coaches work in a methodical way to find those skills that will take your riding to a better place. It was a pleasure in watching how the coaches interacted with each other both on and off track and how they used visual observation and questioning technique to hone in on the skill the riders best need to work on. I look forward in continuing this pursuit for years to come, and would enjoy seeing more of our riders join us on this trip. Truly – you do not need to be a racer or regular track day rider to get the most out of this coursework. Thank you to Nicholas Dib for organizing the trip and to Keith and Dylan Code for being excellent stewards for the sport and for helping me with my personal riding.
Photo Gallery


